
I recently finished one of the most challenging jobs I’ve ever had to build after I was asked to replicate a lawnmower wheel rim to replace a broken one that was no longer available on the market. I can confidently say that because of this job I am now considerably more knowledgeable about the behaviours of the Anet A8 and how to debug errors that occur.


I started off with the decision that doing a revolve sketch would yield the best result and begun sketching up a basic outline in OnShape. It was unnecessary to replicate it exactly so I took the key measurements and transferred them to my sketch. Once it was fully dimensioned I completed the revolve and added the final features.

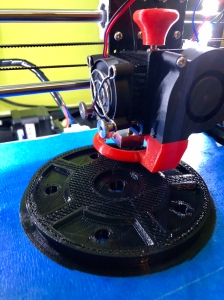
At 125mm in diameter and 37.5mm high, the rim I was replicating is currently the largest object I have printed in one sitting. I exported it into Cura, adjusted the settings and ran the slicer. 12 hours it came up with using a 0.4mm nozzle. I’m not patient enough for that. I opted to use a 0.8mm brass nozzle in an attempt to keep the build time as minimal as possible. Once I had punched in the new numbers, I re-run the slicer and got a new build time of 3.5 hours. Result. Or at least I thought I was onto a winner. Skipping forward a few days that consisted of painstaking starting and stopping and even a complete reassembly of the whole printer I decided to simplify the model, I just could not get a successful first layer.
On the way to work one day I had an epiphany after trying to work out A) how to get it to print properly, and B) if I printed it successfully, how on Earth was I going to get it on the tyre. This spark of ingenuity was the decision to split the model in half and add bolt holes to secure the two halves to the tyre. This would give me a large flat surface to stick to the bed, a means to get it on the tyre and reduced risk of a whole print failing or not fitting for whatever reason.


After the last few days of trial and error I had begun to cotton to the idea that maybe my impatience was getting in the way of my success, I was naively attempting to print at 80mm/s. In order to get it to work I:
- Slowed the print speed from 80 to 60mm/s
- Slowed the initial layer speed from 40 to 20mm/s
- Increased the flow of the initial layer to 105%
- Changed the fan speed to go up in increments spread over 5mm
With all four of these working together I was able to print it absolutely perfectly straight from the get go. It was incredible to watch, all 3 hours and 7 minutes. I printed both halves of the rim separately one after the other so it took just over 6 hours in total. This was still much better than the original 12 hours.

After clearing off all the brim I was finally able to bolt both halves together. The moment I was able to properly compare the new one with the original was incredible.


Now to return it and wait until spring to find out how it performs. I will upload the files to my Thingiverse page as soon as I find out what brand the lawnmower is, in the off chance that someone else can also find solace in repairing theirs instead of it ending up in a landfill.
Update
Files have been added to my MyMiniFactory page with pictures of the wheel finally fitted to the lawnmower, check it out here.

Leave a comment